It’s easy to add Site Sonar tracking to your Google Tag Manager. This guide explains all required steps to get started.
Follow the steps below to set up Site Sonar tracking with Google Tag Manager:
- Login into your Google Tag Manager account.
- Click “Tags” and then “New”.
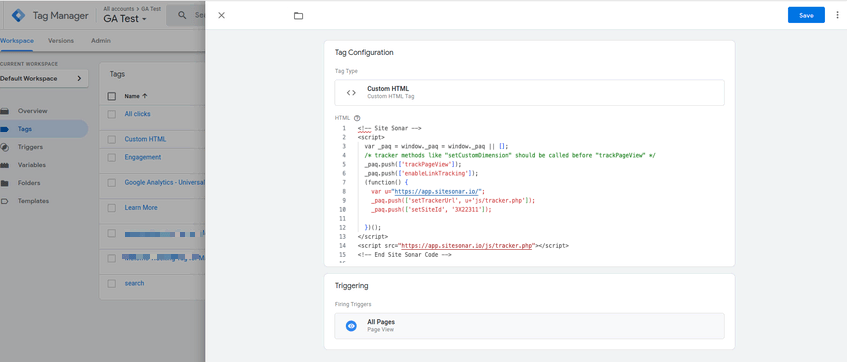
- Click “Tag Configuration” and select “Custom HTML”
- Copy the standard Site Sonar JavaScript Tracking code:
-
-
-
- Log in to Site Sonar with your admin account.
- Click on the “Administration” (cog icon) in the top right menu.
- Click on “Tracking Code” in the left menu (under the “Measurables” or “websites” menu).
- Click on “Tracking Code” in the left menu.
- Click on “JavaScript Tracking” section.
- Select the website you want to track.
- Copy the tracking code.
-
-
- Paste this JavaScript tracking code in the Tag Configuration HTML field.
- Scroll down and click on “Triggering”.
- Select “All Pages” to fire the “Site Sonar tracking tag” on all of your pages.

- Click “Save”.
- Preview your changes by clicking the “Preview” button.
- Check if the Site Sonar tag is firing as expected.
- Publish your changes by clicking the “Submit” button and then the “Publish” button at the top right.
Congratulations! You have successfully set up Site Sonar tracking code via Google Tag Manager. To verify that hits are being tracked, visit your website and check that this data is visible in your Site Sonar instance.
